


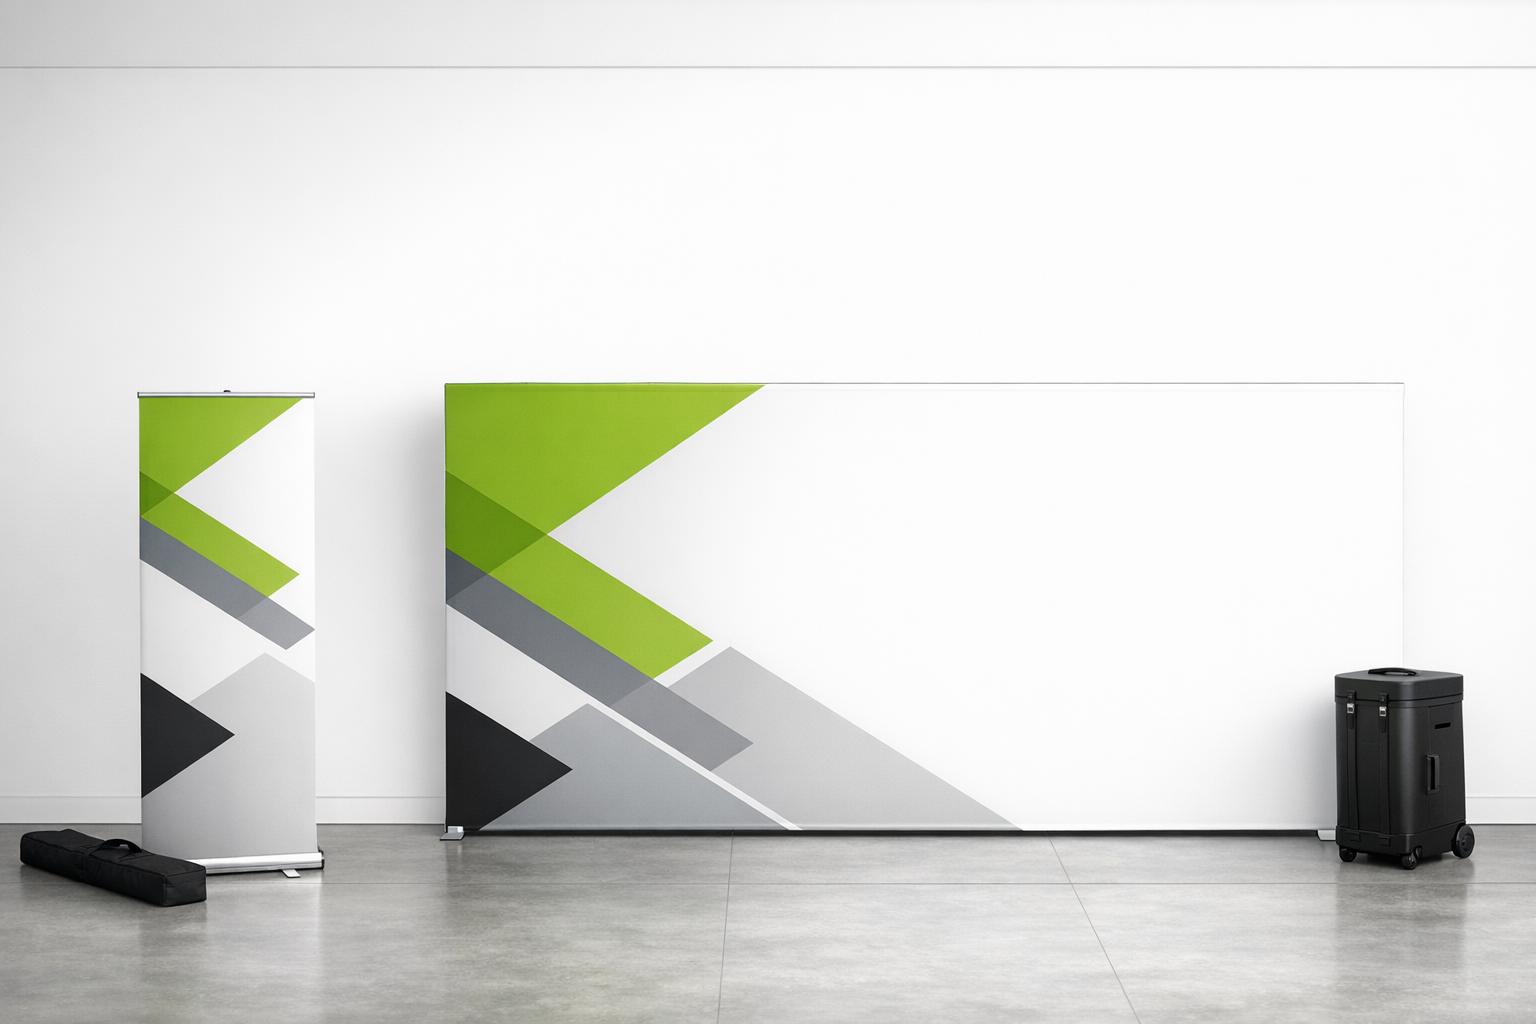
Banner Stand vs Banner Wall: Which Display Delivers Better Results?
When deciding between a banner stand and a banner wall for your event, the choice comes down to your goals, space, and audience. Here’s what you need to know:
- Banner Stands: Compact, portable, and ideal for close-range messaging. They’re quick to set up (under 60 seconds), lightweight (7–15 lbs), and budget-friendly ($200–$500). Perfect for smaller events, directional signage, or as secondary displays in larger booths.
- Banner Walls: Larger and designed for maximum visual impact from a distance (20–40 feet). They create a full branded backdrop for 10×10 or 10×20 booths. Setup takes 10–15 minutes, and costs start around $765. Great for trade shows, press backdrops, and high-traffic events.
Quick Comparison
| Criteria | Banner Stand | Banner Wall |
|---|---|---|
| Visual Range | Close-up (arm’s length) | 20–40 feet |
| Setup Time | Under 60 seconds | 10–15 minutes |
| Weight | 7–15 lbs | 15–30 lbs |
| Footprint | Minimal | Full booth width |
| Best Use Case | Small events, signage | Trade shows, backdrops |
For small spaces or tight budgets, go with a banner stand. For larger booths or bold branding, opt for a banner wall. Pairing both can maximize your booth’s impact without extra space.
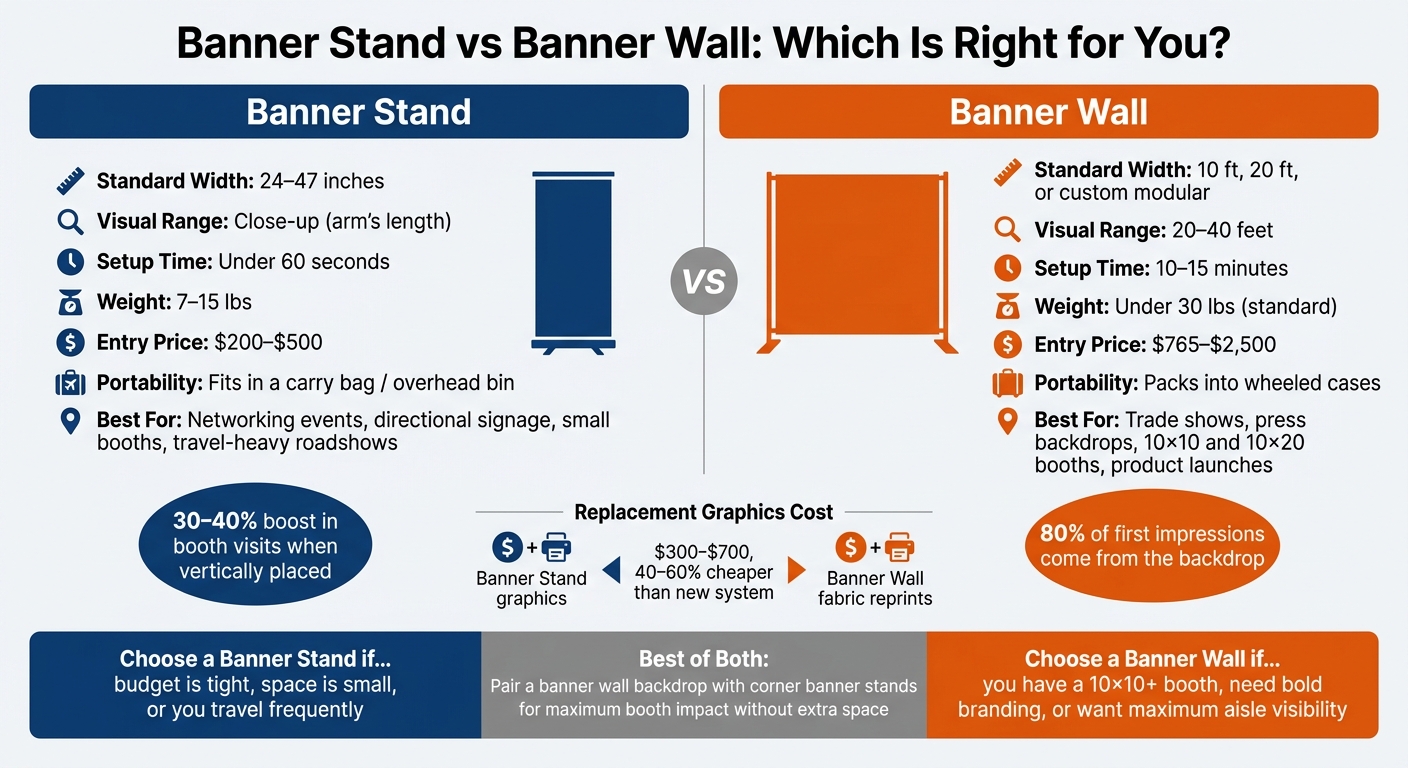
Banner Stand vs Banner Wall: Side-by-Side Comparison
Key Factors for Comparing Banner Stands and Banner Walls
When choosing between banner stands and banner walls for your event display, three key factors come into play: visual impact, setup speed, and space requirements. These elements help clarify the strengths of each option and guide your decision-making process.
Visual Impact and Branding
The size and design of each display type create distinct branding opportunities. A banner wall transforms a 10×10 or 10×20 booth into a cohesive “branded environment”, covering the entire back wall with a seamless graphic. In contrast, banner stands, which are typically 24–36 inches wide, focus on delivering a concise message but may leave visual gaps if used as the main backdrop.
Material and surface quality also play a role. Tension fabric walls feature a matte finish that reduces glare, making them easy to read from distances of 20 to 40 feet. Meanwhile, banner stands shine in close-up settings, offering sharp text and vivid colors for attendees nearby. Research shows that a trade show backdrop accounts for about 80% of an attendee’s first impression, yet it often receives less than 20% of the design focus – a missed opportunity for many exhibitors.
Portability and Setup
Both options are designed for convenience, but they differ in setup time and effort. Retractable banner stands are incredibly quick to assemble – just pull them out of their bag, extend the pole, and you’re done in under 60 seconds. Fabric wall systems take a bit more time, usually 10–15 minutes for one person, but they require no tools or extra help.
When it comes to weight, banner stands are lightweight and portable, ranging from 8 to 15 lbs. A full 10-foot fabric wall system, while larger, still remains manageable at under 30 lbs.
Space and Footprint
The physical space each display occupies is another important consideration. Banner stands have a small footprint, making them perfect for tight areas like retail counters, narrow aisles, or reception desks. On the other hand, banner walls are designed to span the entire width of a standard booth, creating a striking branded backdrop. Some modular wall systems even offer flexibility, allowing configurations like L-shapes or U-shapes for non-standard layouts. However, they may not be the best choice in spaces where every inch matters.
“The backdrop works on everyone who walks down the aisle, whether they stop or not. Getting it wrong means losing potential prospects before your staff has said a single word.” – Tariq Ahmed, Pure Exhibits Team
| Factor | Banner Stand | Banner Wall |
|---|---|---|
| Visual Range | Close-up (arm’s length) | 20–40 feet |
| Setup Time | Under 60 seconds | 10–15 minutes |
| Weight | 8–15 lbs | 15–30 lbs (standard) |
| Floor Footprint | Minimal | Full booth width |
| Branding Scale | Single message | Full branded environment |
Banner Stands: Features, Benefits, and Use Cases
Core Features of Banner Stands
Banner stands are all about quick, portable messaging. The most popular option, the retractable (or roll-up) banner stand, uses a spring-loaded base that neatly stores the graphic. Setup is a breeze – just pull up the banner, secure it to the telescoping pole, and you’re good to go. No tools, no hassle.
These stands are typically made from lightweight aluminum, making them easy to carry. Their vertical design ensures maximum visibility without taking up much floor space. Standard sizes are usually 33–36 inches wide and up to 89 inches tall, which places key elements like logos and headlines right at eye level. For added flexibility, premium models feature interchangeable cassettes, so you can swap out graphics without replacing the entire stand.
“The upper portion of a banner stand is at eye level and receives the most attention. Your logo and primary headline belong here.” – All Flags and Displays
This combination of portability and smart design makes banner stands a go-to choice for quick and effective displays.
Benefits of Banner Stands
Banner stands are built for fast-paced environments, like trade shows, where time and efficiency are crucial. Their portability is a standout feature – retractable models fold down into a padded carrying case that fits in a car trunk or even an airplane’s overhead bin. For teams traveling to multiple events, this convenience can be a game changer.
Cost is another big plus. Basic X-banner stands are budget-friendly, starting at around $50–$100, while premium retractable models range from $300–$600. With high-quality hardware lasting 5 to 10 years and replaceable graphics, you can update your messaging without buying a new stand each time. For teams attending dozens of events annually, this durability adds up to significant savings.
Best Use Cases for Banner Stands
Banner stands shine in settings where quick setup, mobility, and focused messaging are key. They’re perfect for career fairs, smaller conferences, networking events, and retail spaces where a full booth setup might be overkill. Tabletop versions are also great for registration desks or breakout sessions, reinforcing calls to action.
Their versatility extends to complementing larger displays. For example, placing retractable stands at booth corners can help guide attendees toward specific areas, like a demo station. In fact, brands report a 30–40% boost in booth visits when vertical displays are strategically placed compared to relying solely on table setups. For roadshow teams, the ability to pack an entire branded display into carry-on luggage and set it up solo makes banner stands an unbeatable option.
| Model Type | Price Range | Best For |
|---|---|---|
| X-Banner Stand | $50–$100 | Short-term retail, lobbies, one-time events |
| Retractable (Premium) | $300–$600 | Frequent trade shows, roadshows, 50+ events |
Banner Walls: Features, Benefits, and Use Cases
Core Features of Banner Walls
Unlike banner stands that focus on vertical messaging, banner walls stretch horizontally, creating a wide and seamless backdrop. These displays use tensioned fabric over lightweight aluminum frames, typically spanning 8 to 20 feet in width, with modular systems extending even further if needed.
The fabric is printed using dye-sublimation, a method that embeds ink directly into polyester fibers. This technique delivers vibrant, long-lasting graphics that resist cracking, peeling, or fading. Most dye-sublimation prints can withstand 30–50+ events before showing noticeable wear. The aluminum frames are tool-free and snap together, allowing setup in just 10–15 minutes.
Modular systems add even more versatility. A single kit can adapt to various booth layouts without requiring new hardware. For instance, the TRIGA® Go 9m bundle offers over 40 layout configurations, making it easy to adjust for different booth sizes or venue requirements. These technical features result in both visual appeal and functional adaptability.
Benefits of Banner Walls
Banner walls make a bold, large-scale visual impact, creating an immersive branded environment. Their size is a key advantage – take a 10 ft banner wall, for example. It spans the entire back of a booth, delivering a continuous branded image that’s impossible to miss. Since attendees often view booths from 20–30 feet away, this scale ensures your brand stands out.
Another plus? Fabric eliminates the glare problems you’d encounter with vinyl or rigid panels. As Showfire Displays explains:
“The matte finish of fabric also eliminates the glare problems common with vinyl and rigid panel displays, which means your backdrop display looks great under any lighting.”
This makes banner walls perfect for media coverage, product photos, and events with tricky lighting. They’re also cost-effective. When it’s time for a refresh, replacement fabric graphics are 40–60% cheaper than buying a whole new system, as the aluminum frame is reusable for multiple events.
These advantages make banner walls a reliable choice for creating impactful exhibition displays.
Best Use Cases for Banner Walls
Banner walls excel in trade show inline booths, where 10 ft and 20 ft widths dominate the 10×10 and 10×20 booth spaces. They’re also ideal for press conference backdrops, thanks to their smooth, wrinkle-free finish, which looks flawless under camera flashes and studio lighting.
They’re equally effective for corporate conferences, product launches, and retail pop-ups. Modular designs allow brands to reconfigure the same hardware into room dividers, registration areas, or enclosed demo spaces. For high-profile events like CES or NAB Show, backlit LED versions ensure your display shines even in dimly lit venues.
| Size | Typical Width | Best For |
|---|---|---|
| 8 ft Backwall | 7.5–8 ft | Smaller events, 10×10 booths |
| 10 ft Backwall | 9.5–10 ft | Standard 10×10 booths |
| 20 ft Backwall | 19.5–20 ft | 10×20 and 20×20 spaces |
| Custom/Modular | 30 ft+ | Large exhibitions, press backdrops |
For maximum visibility, position your logo and tagline in the upper third of the banner. This ensures your key message remains visible above furniture, crowds, or other booth elements.
sbb-itb-b68070b
Comparison Table: Banner Stands vs Banner Walls
Comparison Criteria and Key Takeaways
Here’s a quick breakdown of the main differences between banner stands and banner walls to help you decide which is the best fit for your event needs.
| Criteria | Banner Stands | Banner Walls |
|---|---|---|
| Standard Width | 24–47 inches | 10 ft, 20 ft, or custom modular |
| Visual Impact | Ideal for targeted, close-range messaging | Seamless, full-width; grabs attention |
| Setup Time | Under 2 minutes (retractable: 30–60 sec) | 10–15 minutes |
| Weight | 7–15 lbs (X-frame models under 3 lbs) | Under 66 lbs for a 30-ft wide wall |
| Portability | Extremely portable; fits in a carry bag | Highly portable; packs into wheeled cases |
| Configuration | Single vertical unit, fixed width | Modular; can form L-shapes, U-shapes, etc. |
| Best Use Case | Networking events, directional signage | Trade shows, press backdrops, larger booths |
| Entry-Level Price | $200–$500 per stand | $765–$2,500 for standard backwalls |
This table highlights how each option excels in different scenarios. Banner stands are perfect for quick setups and smaller spaces, while banner walls provide a larger, seamless canvas ideal for making a bold impression.
As Showfire Displays explains:
“Banner stands remain useful for smaller events and supplemental signage – but they rarely replace the visual power of a full 10ft backwall.” – Showfire Displays
While you could technically line up three 33-inch banner stands to create a 10-foot display, the seams between them can detract from a polished, professional appearance. This detail becomes especially important for events involving photography or media coverage, where a seamless look is key.
For maximum impact, consider pairing a banner wall with a few strategically placed banner stands. This combination enhances your booth’s visual appeal without requiring additional space.
Which Display Should You Choose for Your Event?
Let’s break down how to pick the perfect display for your event by aligning your needs with the best option available.
When to Choose a Banner Stand
If you’re working with a limited budget, have a small space, or need something portable for frequent travel, a banner stand is your go-to. These stands are ideal for regional networking events, hallway signage, or air travel when you’re packing light. With prices ranging between $200 and $500, these retractable stands are budget-friendly and incredibly quick to set up – taking less than two minutes. Plus, they’re compact enough to fit into a shoulder bag.
Banner stands also work well as secondary signage in larger booths. Placing them at 45-degree angles at the booth’s front corners can help attract aisle traffic and highlight specific messages without taking up extra space.
If you need something more impactful for a larger booth, though, a banner wall might be a better fit.
When to Choose a Banner Wall
For exhibitors with a 10×10 or 10×20 booth, a banner wall offers a polished, professional look that covers the entire back of your booth. This seamless backdrop creates a strong branded presence that’s hard to miss.
“A trade show backdrop is the large graphic display that covers the rear wall of your booth space, creating the primary visual impression that attendees see from the aisle.” – Adam Chait, CEO, Displayit
In venues with high foot traffic or poor lighting, a backlit banner wall can make a huge difference. These displays improve visibility by up to 40% and are easily noticeable from 30 to 40 feet away.
Matching Your Display Choice to Your Event Goals
To choose wisely, consider your event scale, goals, and practical needs like setup time and space. If you’re attending multiple events annually and have a dedicated booth, investing in a banner wall is a smart move. A standard 10-foot tension fabric system typically costs $800 to $1,200, with reusable hardware. Graphic reprints, which cost $300 to $700, make it easy to refresh your branding for future events.
For smaller, one-off events or tighter budgets, a banner stand is a better fit. If you’re working with a corner booth, consider a modular wall in an L-shape. This setup creates a semi-enclosed space that naturally encourages attendees to step in.
For many exhibitors, combining a banner wall with a few strategically placed banner stands is the best way to maximize your booth’s impact without needing extra space.
FAQs
How do I choose the right size banner wall for my booth?
To choose the right size for your banner wall, start by checking the dimensions of your booth. For example, a 10×10-foot booth pairs perfectly with a 10-foot-wide backdrop. If your booth is larger, you can opt for wider displays to make the most of your space. Consider modular systems like TRIGA Go, which allow you to adjust the width or even create different shapes, like L or U configurations. This flexibility makes it easier to adapt to various venues and future requirements.
What kind of artwork file is needed for a banner stand or wall?
For TRIGA® displays, create your graphics as full-color dye-sublimated textile prints. These fabric skins come with rubber edging, designed to fit snugly into the graphic rails, ensuring a smooth, wrinkle-free appearance. For specifics like file dimensions or resolution, check out the TRIGA® artwork specifications available on our website.
Which option is cheaper long-term if I exhibit often?
Fabric display systems are a smart investment for frequent exhibitors. Although they may come with a higher upfront cost, their durability and flexibility make them a more budget-friendly option over time. Their lightweight, modular designs not only reduce shipping and drayage expenses but also allow for easy reconfiguration. Plus, with replaceable graphics, you can refresh your display without replacing the entire system, making it adaptable for different event spaces and needs.