
The 15-Minute Stand: Fast TRIGA® Setups You Can Build Before Coffee
Trade Show Setup Made Simple: Be Ready Before Your Coffee Cools
Trade-show mornings are never calm. The doors open soon, visitors are streaming in, and your booth needs to look sharp, functional, and welcoming — fast. If that sounds familiar, you’re not alone. Every exhibitor faces the same challenge: how to get everything up and running without stress. That’s where TRIGA® makes life easier. With lightweight frames, tensioned fabric graphics, and a tool-free design, you can create a professional setup in minutes — every time, no matter the venue.
Why Speed Matters More Than You Think
Every extra minute you spend building your stand is a minute lost from engaging with potential clients. Fast, reliable setup doesn’t just make life easier — it directly affects your results. To get there, you need three simple things:
- A clear order of steps – A repeatable system removes guesswork and keeps everyone on the same page.
- Tool-free hardware – When everything clicks together, you don’t waste time hunting for missing tools or fiddling with screws.
- Wrinkle-free graphics – Tensioned fabric looks polished and camera-ready, even under harsh trade show lighting.
Pro tip: Do one full setup practice in your office using your exact kit. You’ll shave minutes off your show-day setup and walk in with total confidence.
The 5 Quick Steps to Setup Success
Remember: Stage → Frame → Sleeve → Cable → Dress
- Stage: Roll your bags to your booth space. Lay everything out by module so you can see what’s what before you start.
- Frame: Click the frames together — no tools, no fuss. You’ll be surprised how fast it locks into place.
- Sleeve: Slide the fabric skins onto the frames and pull them tight for that signature TRIGA® tensioned finish.
- Cable: Run power early. It’s much easier to route and tidy cables before counters and walls block your reach.
- Dress: Add the finishing touches — your tablet, QR code, product samples, and brochures. Then give everything a quick wipe for a spotless look.
Once you get into the flow, it feels natural — and you’ll be setup before you know it.
Three Quick Layouts You Can Build Before Coffee Time
Layout A (≈12–15 min): The Welcome Wall + Counter
This layout is perfect for 3×2 m spaces, hotel rooms, and roadshows. It gives you a clean, branded backdrop with a friendly greeting point for visitors.
You’ll need:
- 1× freestanding TRIGA® wall (single-sided if the back isn’t visible)
- 1× TRIGA® counter with internal shelf
- Optional: small LED for subtle lighting
Setup plan:
- 0–3 min: Stage parts and assign roles (Frame Lead, Graphic Lead)
- 3–8 min: Build the wall and sleeve the counter
- 8–12 min: Sleeve wall graphics, add QR codes, and stock literature
- 12–15 min: Tidy cables, wipe surfaces, and do a quick final check
Pro tips: Add a second QR code at eye level so people can scan while the counter is busy. If your wall is backlit, double up the fabric or use a denser print to keep colors rich and vibrant.
Layout B (≈10–12 min): Demo Totem + Screen
If you’re running product demos or looping videos, this compact setup turns your booth into an instant attention magnet. It’s small, sleek, and easy to build anywhere.
You’ll need:
- 1× TRIGA® totem (≈1 m wide, 2–2.5 m high)
- 1× small screen + lightweight mount
- 1× low counter for peripherals or handouts
Setup plan:
- 0–2 min: Stage your kit and lay out cables
- 2–6 min: Click the totem frame together, sleeve it, and tension
- 6–9 min: Mount your screen, connect HDMI and power, and tidy cables
- 9–12 min: Position the counter, load your video, and test AV
Pro tips: Use a looping video on a small media player or USB — no laptop needed. Keep your screen centre around 1.5 m high for perfect visibility. Label cables clearly; a neat setup always looks more professional.
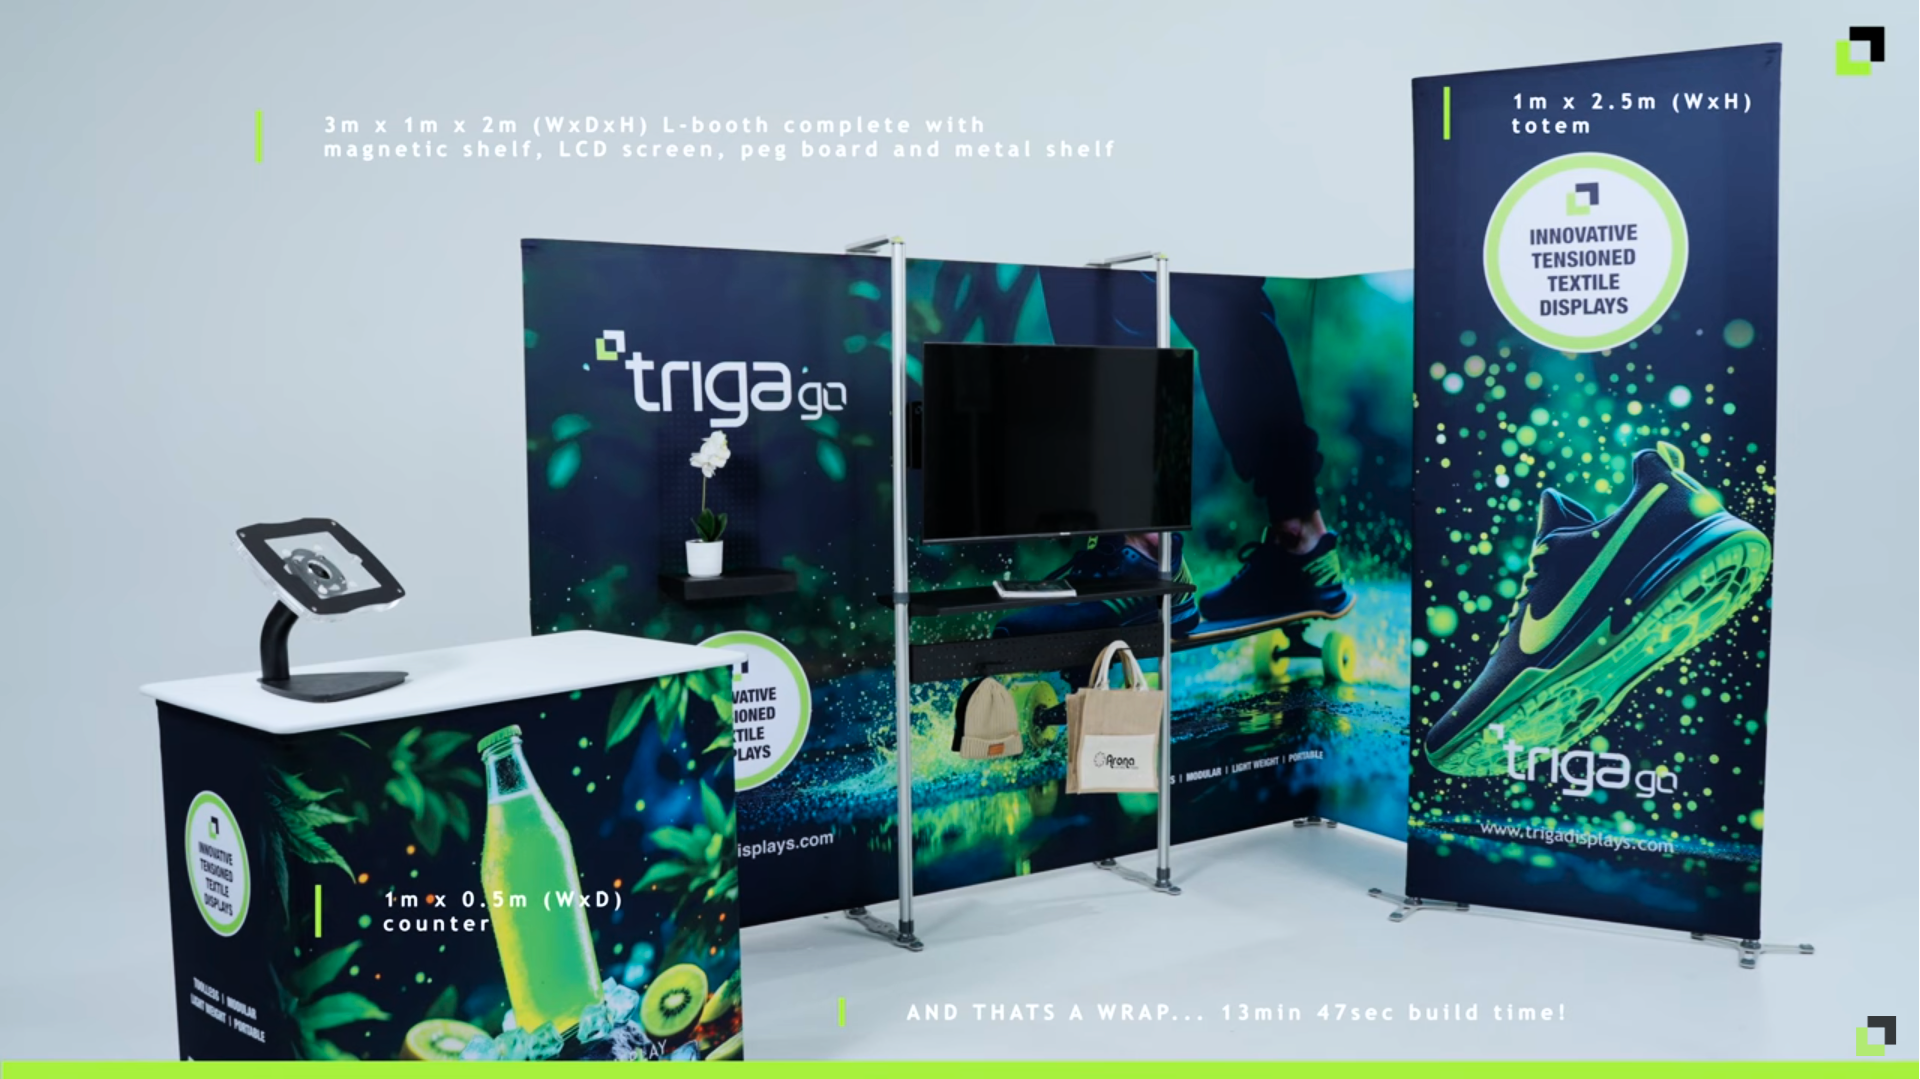
Layout C (≈12–15 min): L-Booth Lite
When you’ve got a corner plot or shell-scheme corner, this two-wall layout creates a warm, semi-enclosed space that encourages people to step inside.
You’ll need:
- 2× TRIGA® walls meeting at 90°
- 1× counter slightly inside the booth
Setup plan:
- 0–3 min: Stage both wall kits and counter
- 3–10 min: Two people frame one wall each; whoever finishes first sleeves the counter
- 10–13 min: Sleeve both walls, align the corner, and check sightlines
- 13–15 min: Place counter, add a small rug or plant, and do a quick wipe
Pro tips: If a wall back is visible, use a second skin or position a totem behind it. Keeping the counter slightly inboard naturally invites visitors in.
Pack Once, Use Everywhere
TRIGA® frames and counters are designed for simplicity and longevity. They pack flat into compact carry or wheel bags — easy to store, ship, and manage even solo. Reuse the same hardware for years and simply swap the fabric skins for each new campaign. Quick pack-down also means less stress at the end of the show and fewer missing parts. You’ll quickly find it’s not just faster — it’s smarter and more sustainable too.
Graphics That Behave (and Photograph Perfectly)
Tensioned fabric has a clean, modern look that photographs beautifully under exhibition lighting. On smaller modules like totems, sleeves slide on and tension instantly. On larger walls, the same system gives a crease-free, professional surface every single time. Pro tip: Label each fabric skin by module and side (for example, “Wall A Front”). Then tuck a photo of the finished booth into the same bag. You’ll thank yourself later during repack.
TRIGA® Go vs. Heavier Systems
Both have their place — it just depends on your setup needs.
| System | Ideal For | Why It Works |
|---|---|---|
| TRIGA® Go | Small to medium setups (up to ≈2.5 m) | Fast, light, affordable, and perfect for roadshows or pop-ups |
| Heavier Systems | Large booths, long spans, heavy screens, or deep shelving | Same sleek fabric look but with added strength and flexibility |
Mixing the two gives you the best of both worlds — portability and power.
Team Flow That Saves Minutes
Even small booths benefit from a bit of choreography. Assign clear roles to keep setup smooth:
- Frame Lead: structure
- Graphic Lead: skins and visuals
- Utility Lead: power, cables, and finishing touches
Keep setup seamless by staging parts by module (Wall A, Wall B, Counter), colour-coding uprights, marking skins by side, running cables early, and doing one full “dry run” before your first event. That single practice session can save 10–15 minutes every time.
Sustainability That Makes Sense
TRIGA® systems aren’t just reusable — they’re built for long-term value. Reuse your frames for years and only replace the fabric prints you need. Fold fabrics print-side in, store them dry, and they’ll last far longer. By reducing shipping volume and material waste, you save money and help the planet. Good for business, good for your brand story.
Your Quick Pre-Show Checklist
Before You Go
- Export final artwork and pack spare panels
- Label every bundle and skin clearly by module
- Place a reference photo in each bag
- Preload videos, PDFs, and any interactive media
- Stock a “utility pouch” with tape, wipes, spare HDMI, and extension leads
On Site
Follow the rhythm: Stage → Frame → Sleeve → Cable → Dress. Then do a quick system test — QR codes, screens, and lights — and snap a quality check photo.
Tear Down
- Wipe everything clean
- De-sleeve and fold print-side in
- Coil and bag cables neatly
- Note any replacements needed for next time
- Take a packing photo for reference
Bottom Line
Trade shows move fast, but your setup doesn’t have to be stressful. With the right system and a simple rhythm — Stage, Frame, Sleeve, Cable, Dress — you’ll have your booth ready before your coffee cools. Pick your layout, label everything, and practice once. When the doors open, you’ll be calm, confident, and ready to do what really matters — welcoming people into a space that’s on-brand, intentional, and ready to win.
Want to see it in action? Watch our quick setup video here.